Vibe Coding a Game Boy Emulator
A Screenshot-Essay
This is a short story, in screenshots, of the 10 days I spent vibe coding a Game Boy emulator. I am not a total novice when it comes to coding emulators. Five years ago I built a Game Boy Color emulator in Rust which took many months and was one of the most soul sucking experiences of my life.
So naturally, I decided to do it again. But this time I had a powerful new friend: Claude Code. This time it was gonna be different... Right?
The Most Beautiful Way to Write an Emulator
A Game Boy emulator is a collection of clocked state machines. One such state machine is the CPU. Others include the Pixel Processing Unit (PPU), the Audio Processing Unit (APU), the Timer, etc.
I think the most elegant way to implement these is using
coroutines. For
five years I have had a dream of implementing a cycle-accurate Game Boy
emulator in Rust using coroutines. Unfortunately, the Rust coroutines
RFC has been
open for 8 years. So waiting for the feature to become stable was a lost
cause. On the other hand, async-await is part of stable
Rust and converts your functions into state machines behind the scenes.
So perhaps I could abuse that?
A few months ago I finally implemented a custom async driver that allowed me to write (the screenshots are coming, I promise):
async fn cpu() {
    sleep(3).await;
    println!("CPU: 1");
    sleep(3).await;
    println!("CPU: 2");
}

async fn ppu() {
    sleep(4).await;
    println!("GPU: 1");
    sleep(1).await;
    println!("GPU: 2");
}

async fn apu() {
    sleep(3).await;
    println!("APU: 1");
    sleep(2).await;
    println!("APU: 2");
}

fn main() {
    let mut driver = Driver::new();

    driver.spawn(cpu());
    driver.spawn(ppu());
    driver.spawn(apu());

    // Run for 100 cycles.
    driver.run_for(100);
}
After implementing this library the temptation to use it for a Game Boy emulator was too strong to resist. The only problem was that it takes around 2-3 months to implement a working emulator. I really didn't want to spend that much time. Then came along Claude Code.
The CPU
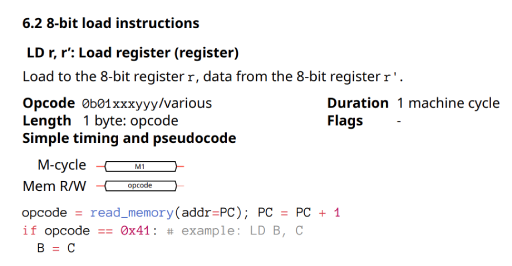
I used Gekkio's GBCTR to get cycle accurate timings for the CPU instructions. At first I literally copy pasted the text (bad formatting and all) of a single instruction into Claude Code. The results looked promising so I started pasting in dozens of instructions at once.

Downhill (the bad kind)
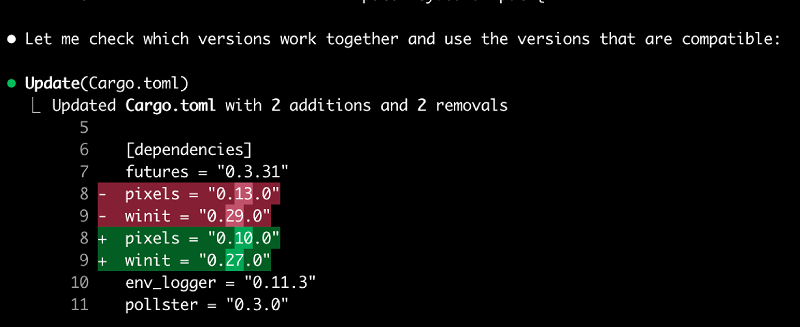
The honeymoon period ended quickly. The first signs of badness showed when Claude Code downgraded my pixels and winit crate versions because it had outdated knowledge of their APIs. I had not provided Claude Code with the latest documentations for these crates. I tolerated this at first but the next day removed pixels + winit and switched to using SDL2 for the UI instead.
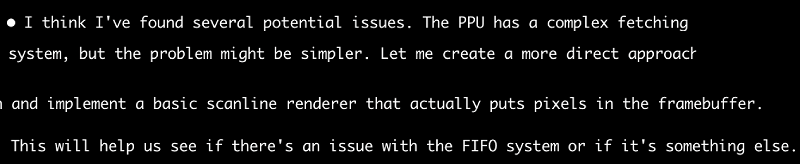
The complexity started mounting while vibe coding the cycle-accurate PPU. It was getting difficult for Claude Code now. At one point it rewrote my cycle-accurate PPU using a simple scanline renderer approach in order to pass some tests. It may even have been just to appease clippy1!
Claude never reverted the code back to the cycle-accurate PPU after passing whatever tests it wrote (or after satisfying clippy) and left me with a dumb scanline renderer PPU! I was furious!
Hope you Like the Color Green

I vibe coded just enough to coax a ROM into running. It went about as well as you'd expected. The result was the above green LCD screen.
Naturally, I prioritized what was important. I procrastinated on fixing the bugs and instead vibe coded fun stuff like debug windows.
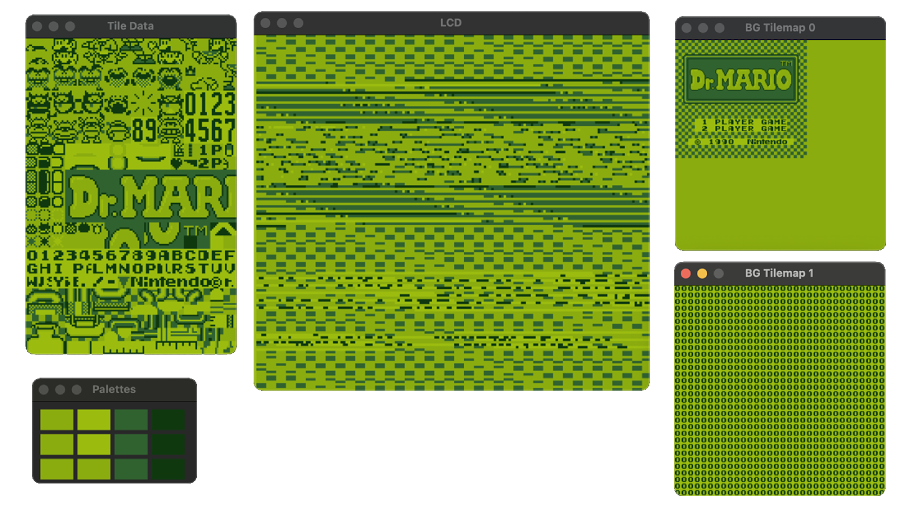
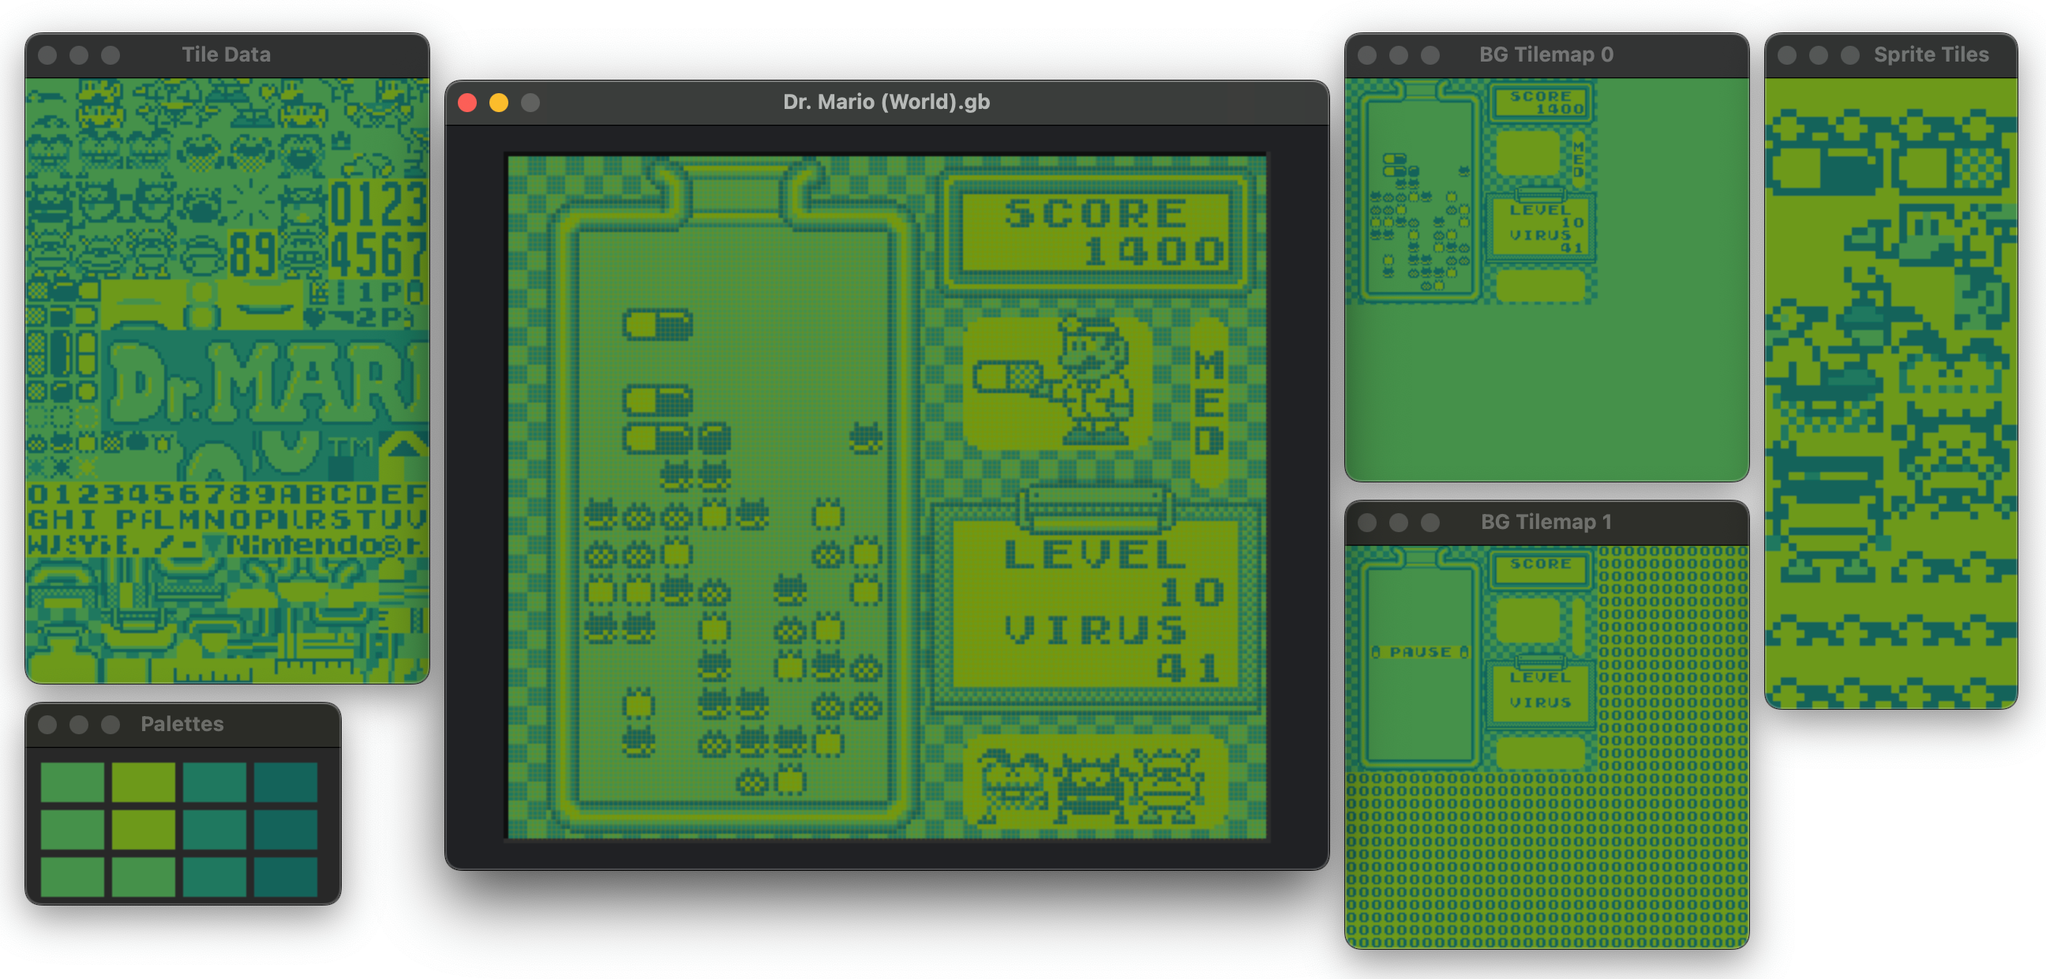
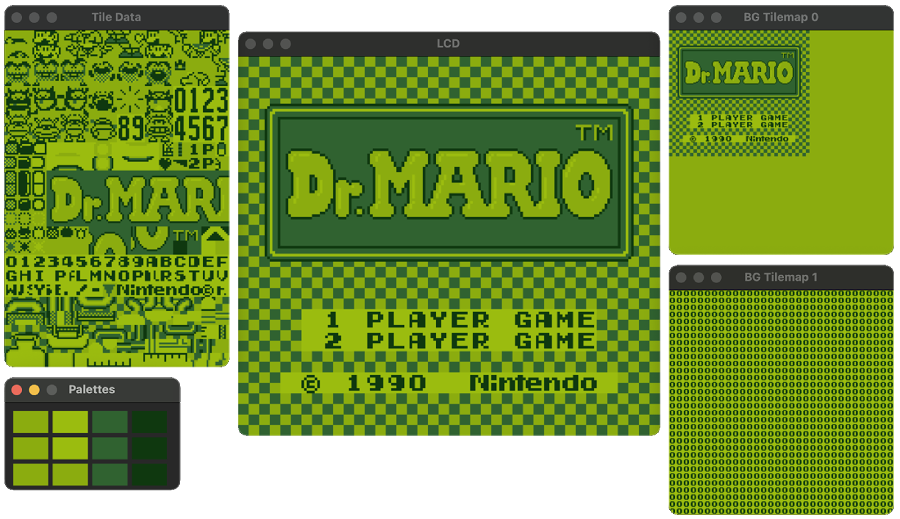
The issues, it turned out, were with my VRAM writes and my VBlank UI event. This event tells my UI to redraw pixels on the LCD window, and it was only firing one time. So fixing that got me to the glitchy (but still better than before) Dr. Mario image above. Tetris, however, was still showing a blank screen.

The community has made several test ROMs. One of these is Blargg's CPU instructions test. Mine was getting stuck on the third test for some reason.
By this point, I had started relying less on Claude Code and was just pasting all of my code into Gemini 2.5 Pro, o3, and Claude Opus 4. Prospects felt grim. I wasn't familiar with my own codebase. / Sunk cost syndrome set in and I was now in a near catatonic trance from all the vibe coding. Think 6 year old Timmy after he spends an hour watching YouTube shorts.
Slot Machine
After enough rounds of agentic bogo sort I finally fixed some critical bugs and vibe coded my way to this.
Blargg's test was still hanging and my PPU was missing sprites rendering logic.
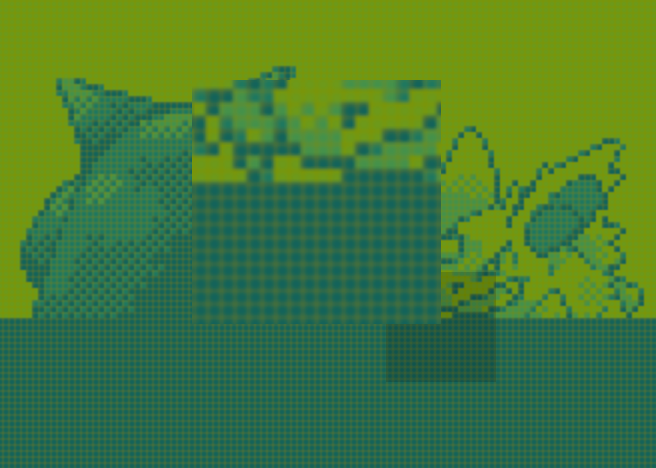
Again I procrastinated -- vibe coding a faux-realism effect for the LCD. I had previously assumed this could only be done using shaders but realized I could just overlay a semi-transparent yellow grid on top of the LCD window. I also switched to the BGB2 color palette.
Expert Advice
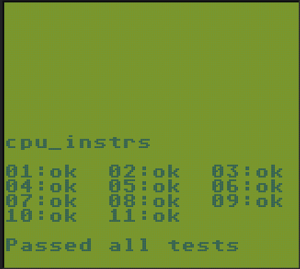
The breakthrough finally came when an expert on discord inspected my
emulator's raw byte dump of Blargg's CPU instruction test and realized
that the ROM was thinking it was running on a Game Boy Color device.
This was because I was incorrectly returning 0x00 for
unused register reads instead of the correct 0xFF.
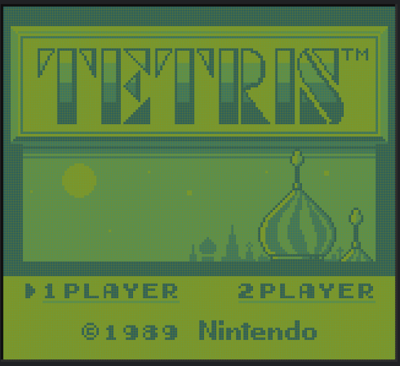
Tetris gave me a headache but the same expert helped me out once again. The culprit was my missing Joypad implementation. Vibe coding that fixed the game.
Final Tasks
The three last milestones were implementing the APU, passing matcurrie's DMG3 Acid 2 test4, and emulating Prehistorik Man somewhat decently. The APU took some iterating but I finally got it to play some nostalgic 8-bit tunes.
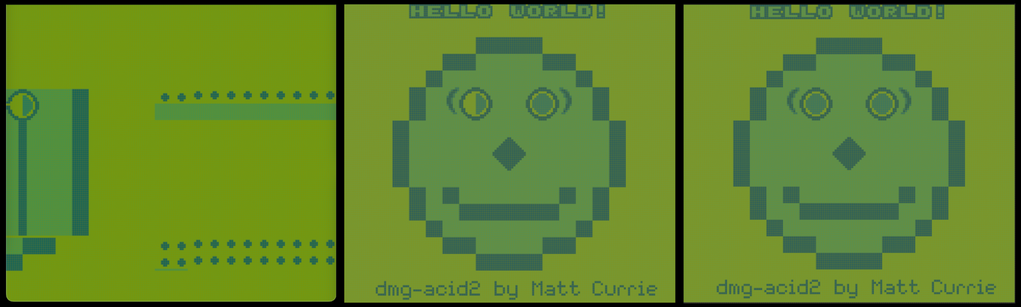
It took some herculean effort to pass the DMG Acid2 test. This was another moment when I felt like giving up and didn't think I'd ever pass it. After several failed attempts with the other two LLMs, I pasted all of my code into Claude Opus 4 which proceeded to think for 5 minutes and 10 seconds before one-shotting the solution. It still didn't pass the test entirely but the output went from the image on the left to something close to the middle image.
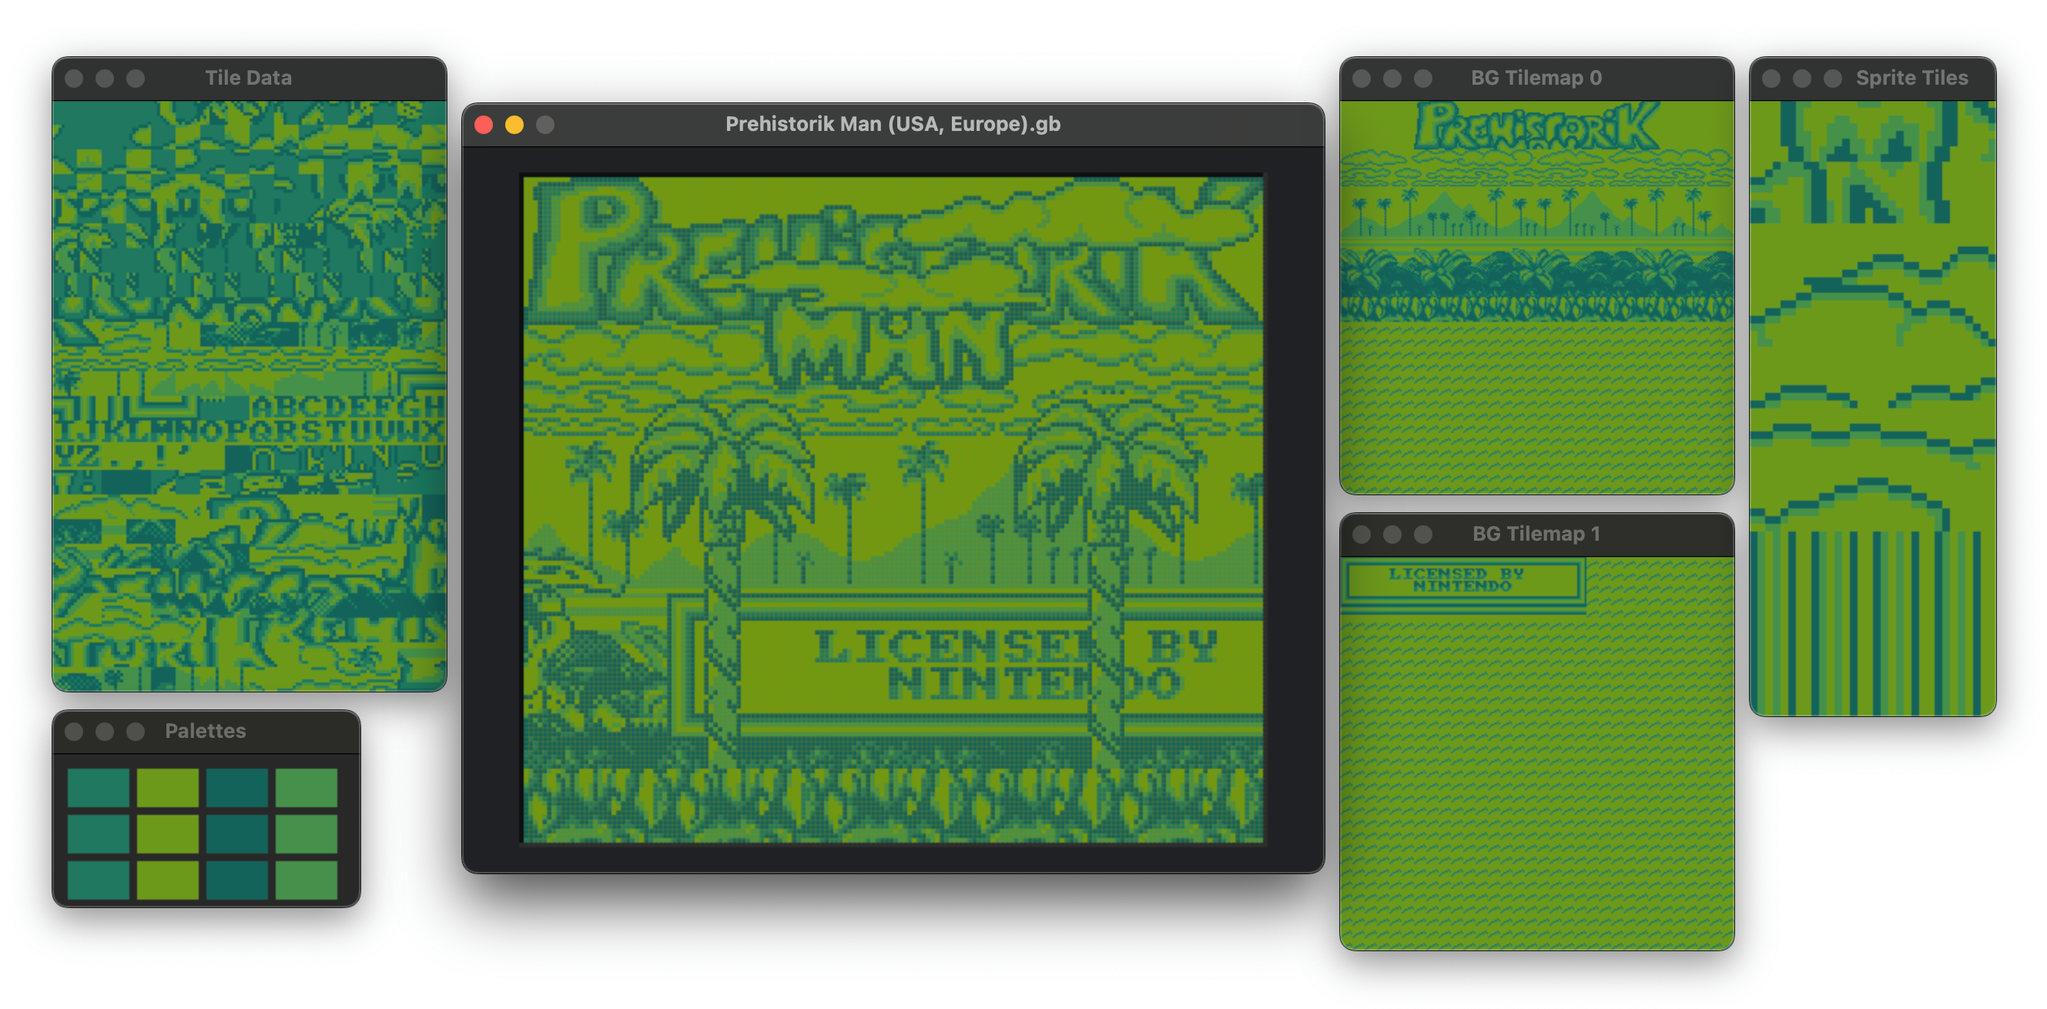
The final boss of the project was Prehistorik Man's opening sequence. This also took many-a runs of the Gemini bogo sort before I finally managed to play the audio and render the intro without any egregious bugs.
Conclusion
The journey started on a high but the experience quickly plummeted as the complexity grew. There's definitely a lot I could've done better and this was a good learning experience. But overall I found that where vibe coding excelled was when I had the agent implement small, mostly self-contained, well-defined pieces.